I once thought lasers demanded genius-level skills; most new buyers feel the same panic. Pain sets in when they imagine fried circuitry or burned stock. The fix is simpler: pick the right machine, follow a short plan, and lean on proven resources.
With a modern Kirin Laser engraver, you can move from “zero clue” to confident production faster than any other workshop tool—often inside a single workweek.
A single clean test cut flips fear into excitement. Stay with me while I unpack each step, layer by layer, so you can see why skills matter less than process.
Is it hard to learn to use a laser engraver?
We all dread steep learning curves. Pain grows when software looks like a pilot cockpit, and each button threatens expensive misfires. I show new owners how to cut that fear with a four-phase path and one small win per hour.
Laser engraving feels hard only until you break it into repeatable micro-tasks: connect, focus, test, adjust. Master those, and the machine becomes a polite coworker that never calls in sick.
Phase-by-Phase Learning Map
| Phase | Time | Core Skill | Typical Mistake | Quick Fix |
|---|---|---|---|---|
| Connect | 30 min | USB/ethernet link1 | Wrong driver | Use Kirin auto-installer |
| Focus | 15 min | Z-axis control2 | Lens too high | Slip 3 mm shim under nozzle |
| Test Grid | 45 min | Power/speed dial-in | Forget air assist3 | Toggle pump in software |
| First Real Job | 60 min | Position art | Start without frame | Run a 0 power framing pass |
Deeper Friction Points
1. User Interface Shock
Hide advanced panels. Create a “Beginner” workspace preset. One toolbar: import, position, set, run.
2. Focus Fear
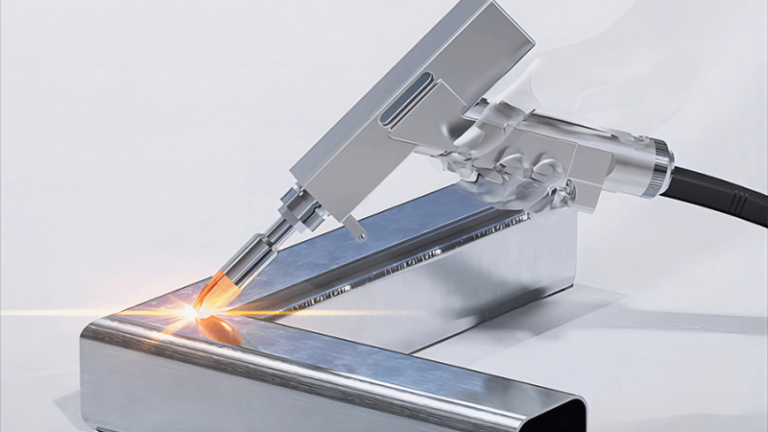
CO₂ systems rely on mirror alignment; fiber systems have fixed optics. Use our autofocus probe or the acrylic shim trick.
3. Material Uncertainty
I give every buyer a laminated chart for wood, acrylic, coated metal. Less scrolling, more burning.
Personal note: My first job was 200 leather key fobs. I wasted four blanks before realizing my air nozzle sat 5 mm off center. One Allen key twist solved it. Lesson: most “hard” problems hide in plain sight.
Is laser engraving hard?
The word “laser” carries sci-fi weight. Pain spikes when beginners imagine eye-searing beams and fragile optics. Agitation follows as they juggle airflow, chillers, and vector paths. We deflate that tension with safety layers and turnkey presets.
Laser engraving is no harder than operating a desktop printer once safety interlocks, focus aids, and material libraries do the heavy lifting. Your real work shifts from technical wrestling to creative design.
Four Layers That Remove the “Hard”
| Layer | CO₂4 | Fiber | How It Helps Beginners |
|---|---|---|---|
| Hardware | Pre-aligned mirrors | Solid-state path | No delicate tweaks |
| Safety Cage | Class I enclosure | Class I enclosure | Beam auto-kills on door open |
| Autofocus5 | Capacitive probe | Fixed lens height | Removes manual Z guesswork |
| Material Library6 | 40 presets | 28 presets | One-click power/speed |
Hard Bits Demystified
Beam Alignment
Fiber: none needed. CO₂: done at factory; double-checked before ship.
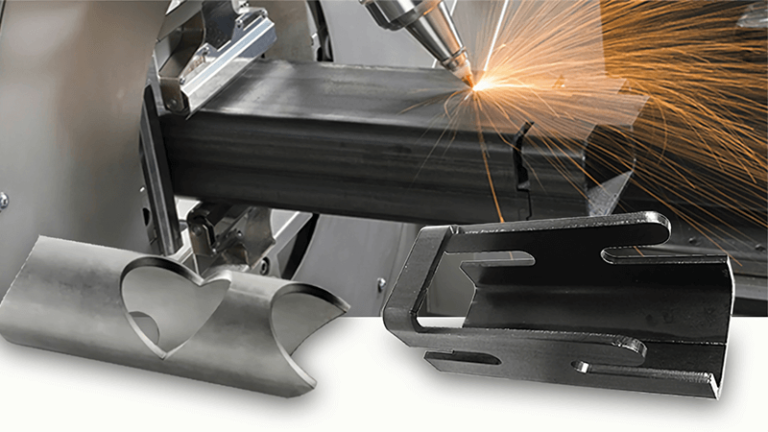
Exhaust Setup
Clamp 100 mm duct, run to a window. Add inline fan if duct >4 m.
Chiller vs. Air-Cool
CO₂ tubes crave 18–20 °C water. Fiber sources air-cool. I include a plug-and-play chiller with every CO₂ kit.
Skill vs. Automation Comparison
| Task | 2015-era DIY | 2025 Kirin Pro CO₂ |
|---|---|---|
| Mirror align | 45 min with ruler | 0 min (factory locked) |
| Focus | Manual gauge block | Autofocus touch probe |
| Vent control | Toggle wall switch | Auto-start on job run |
| Job repeat | Manual origin reset | Onboard camera auto-locate |
After these layers kick in, the only “hard” part left is choosing the right font for your client’s tumblers.
How long does it take to learn laser engraving?
Time anxiety kills many purchase dreams. Pain appears when owners picture months of trial-and-error and lost stock. We counter with a proven seven-day sprint. Each day solves one cluster of tasks, so momentum never stalls.
Most users reach billable quality inside one week, logging roughly 15 focused hours. Even partial evenings work if you stick to the sequence.
Seven-Day Sprint Schedule
| Day | Goal | Hands-on Hours | Deliverable |
|---|---|---|---|
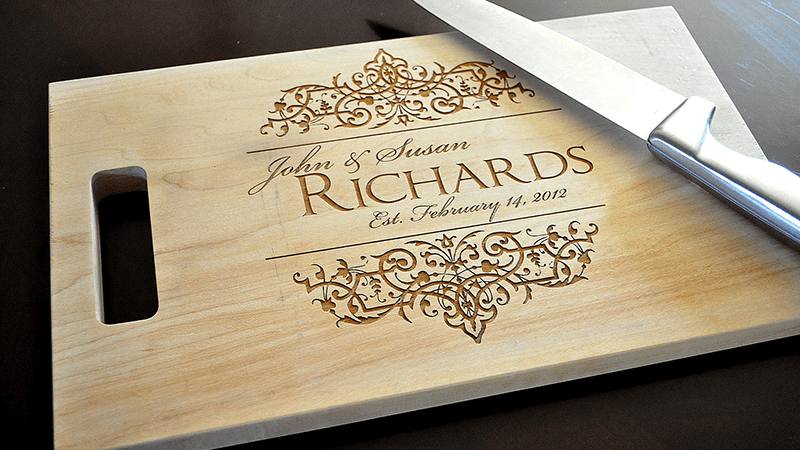
| 1 | Power-on & first engraving | 2 | Name tag on plywood |
| 2 | Vector mastery | 2 | Company logo on acrylic |
| 3 | Raster photo | 3 | Pet portrait on anodized tag |
| 4 | Batch fixtures7 | 2 | 25 keyrings serial-engraved |
| 5 | Material library | 2 | Saved presets (wood, acrylic, alum, leather) |
| 6 | Maintenance & QC8 | 2 | Lens clean, rail lubed, backup files |
| 7 | Pricing & workflow | 2 | Cost spreadsheet + checklist |
ROI Calculation Table9
| Item | Cost (USD) | Typical Retail Price | Units to Break Even |
|---|---|---|---|
| Bamboo bookmark | 0.35 | 4.00 | 620 |
| Leather key fob | 0.75 | 8.00 | 270 |
| Stainless tumbler | 3.25 | 28.00 | 85 |
The math shows why a short ramp matters. A weekend craft fair can pay off half the machine if you hit Day 4 targets.
Case story: A high-school art teacher bought our 30 W fiber unit on Friday, followed the sprint, and sold 60 pet tags at Sunday’s market. She covered two chiller payments in 48 hours.

What do you need to use a laser engraver?
Procurement lists can balloon into stress. Pain spikes with every add-on. Agitation sets in when vendors upsell five gadgets you may never use. I cut through the noise with a “Core Four” checklist: power, air, vent, space.
You only need a 220 V outlet, an air-assist pump (or onboard compressor), an extraction path, and enough tabletop clearance. Everything else ships in the crate.
Core Four Checklist for Laser Engraver
| Need | Spec | Why It Matters | My Best Hack |
|---|---|---|---|
| Power | 220 V / 20 A | Stable watt draw | Plug into surge-protected breaker10 |
| Air Assist | 25 L / min, oil-free | Clears debris & cools cut | Quiet desktop diaphragm pump11 |
| Ventilation | 100 mm duct, ≤4 m run | Removes fumes | Tape seam joints to stop leaks |
| Space | Machine foot-print + 50 cm | Service access | Put casters on workbench |
Optional Upgrades Matrix
| Upgrade | CO₂ Desktop | CO₂ 1.5 m Bed | Fiber Station |
|---|---|---|---|
| Rotary Axis | ✔ | ✔ | ✔ |
| 5 MP Overhead Camera | ✔ | ✔ | n/a |
| Pass-Through Slot | n/a | ✔ | n/a |
| Smart Filter Box | ✔ | ✔ | ✔ |
Safety Workflow
- Interlock Test – Open door mid-job; beam must cut out.
- Fume Check – Hold incense near seam; smoke should flow inward.
- Fire Drill – Keep CO₂ extinguisher within 2 m; test monthly.
My rookie mistake: I once skipped the vent tape step. First client visit, the room smelled like burnt lacquer. Three strips of foil tape later, air moved cleanly. Small details beat fancy add-ons every time.
Conclusion
Laser engraving12 rewards methodical steps, not innate genius. With Kirin Laser’s safety layers, autofocus, and material presets, “hard” drops to four clear tasks. Follow the seven-day sprint, set up the Core Four, and you can charge for custom work inside a week. I’ve watched tech-shy crafters and high-tech engineers hit the same aha moment: the first clean burn. When that logo glows on fresh wood, you’ll know skill was never the real barrier—process was. Now the process is yours.
-
Explore this resource to understand the best practices for establishing a reliable USB/ethernet link, ensuring smooth operation of your laser cutter. ↩
-
This link will provide insights on adjusting Z-axis control effectively, helping you avoid common mistakes and improve your cutting precision. ↩
-
Learn about air assist and its importance in laser cutting to enhance your results and prevent material damage during the process. ↩
-
Explore the advantages of CO₂ lasers for cutting and engraving, including efficiency and precision. ↩
-
Learn how autofocus technology simplifies laser cutting, enhancing accuracy and reducing manual adjustments. ↩
-
Discover how a material library streamlines the cutting process with presets for various materials, saving time and effort. ↩
-
Learning about batch fixtures can help streamline your engraving process, saving time and increasing productivity. ↩
-
Exploring maintenance and QC practices can enhance the longevity of your equipment and improve the quality of your work. ↩
-
Understanding ROI calculation tables can help you make informed financial decisions and assess the profitability of your projects. ↩
-
Understanding surge-protected breakers can help you ensure stable power supply and protect your equipment from damage. ↩
-
Explore how a quiet diaphragm pump can enhance your workspace by reducing noise while improving air assist efficiency. ↩
-
Know how CO2 engraving machine works, and click this link to get your best solutions. ↩