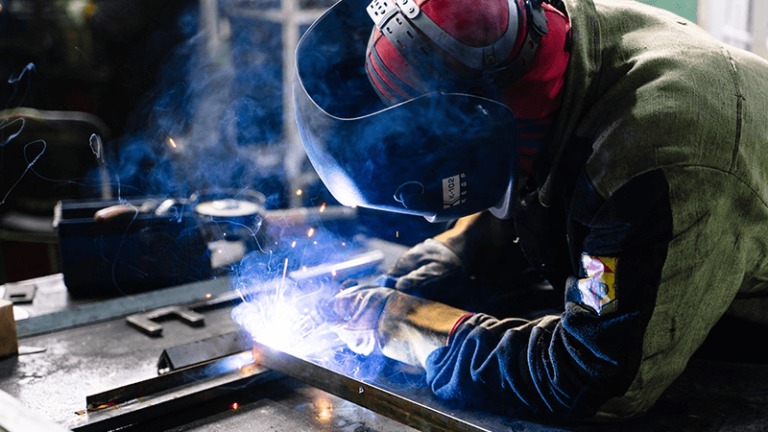
When it comes to laser welding, getting the settings just right is the key to achieving the perfect weld. Too much power, and you risk burning through the material; too little, and you won’t achieve a strong bond. As a sales engineer at Kirin Laser, I’ve helped countless businesses optimize their laser welding machines for various applications, and I can tell you – the right settings can make all the difference.
So, how do you set your laser welding machine for different applications? The process isn't as complicated as it sounds. With the right approach, anyone can master the settings and get consistent, high-quality welds every time.
Before we dive into the nitty-gritty of settings, let’s make sure you understand why getting this right matters. A laser welding machine that’s set up incorrectly can result in weak welds, wasted material, and frustrated operators. On the other hand, with the right settings, you can achieve precise, strong, and clean welds that save time and cost in the long run. In this guide, I’ll take you through the essentials of setting up your laser welding machine for all types of applications.
Proper calibration of the laser welding machine ensures optimal weld quality.True
Calibrating the laser head and clearing optics ensures better alignment and higher-quality welds.
Choosing the right auxiliary gas is unnecessary for laser welding.False
Selecting the appropriate auxiliary gas, like argon or helium, is crucial for material protection and weld quality.
How to Choose the Right Laser Welding Machine for Your Application?
Choosing the right laser welding machine starts with understanding your materials and needs. Laser welding isn’t a one-size-fits-all process – there’s a variety of machines designed for different materials, thicknesses, and precision levels. You’ll need to evaluate factors like:
- Material type (stainless steel, aluminum, titanium, etc.)
- Thickness (how thick is the material you’ll be welding?)
- Precision requirements (do you need micro-welding or larger joints?)
The best machine for your needs will vary based on these factors. For example, if you’re working with thin metals, you might want a machine with higher precision and a more focused beam. If you’re welding thicker materials, you’ll need more power.
The following table provides a comprehensive overview of the common parameters for laser welding machines with different power levels, specifically for stainless steel, aluminum alloy, carbon steel, and copper materials. It will help you to choose the best laser welding machine according to your actual applications.
| Material | Power | Welding Speed (mm/s) | Spot Diameter (mm) | Pulse Frequency (kHz) | Weldable Thickness (mm) |
|---|---|---|---|---|---|
| Stainless Steel | 1.5kW | 30 - 60 | 0.2 - 0.4 | 20 - 50 | ≤3.5 |
| 2kW | 40 - 80 | 0.3 - 0.5 | 30 - 70 | 1 - 6 | |
| 3kW | 60 - 100 | 0.4 - 0.6 | 40 - 100 | 0.1 - 3 | |
| Aluminum Alloy | 1.5kW | 20 - 50 | 0.2 - 0.3 | 15 - 40 | ≤3.5 |
| 2kW | 30 - 70 | 0.3 - 0.4 | 20 - 60 | 1 - 5 | |
| 3kW | 40 - 90 | 0.4 - 0.5 | 30 - 80 | 1 - 3 | |
| Carbon Steel | 1.5kW | 25 - 55 | 0.2 - 0.4 | 18 - 45 | ≤3.5 |
| 2kW | 35 - 75 | 0.3 - 0.5 | 25 - 65 | 1 - 6 | |
| 3kW | 50 - 100 | 0.4 - 0.6 | 35 - 90 | 0.5 - 8 | |
| Copper | 1.5kW | 10 - 30 | 0.2 - 0.3 | 10 - 30 | ≤3 |
| 2kW | 20 - 40 | 0.3 - 0.4 | 20 - 50 | ≤3 | |
| 3kW | 30 | ≥0.4 | ≥30 | 1 - 3 |
Notes:
- Parameters may vary due to differences in material composition, surface condition, and joint configuration.
- Actual operations should adjust welding parameters according to specific situations to ensure welding quality and efficiency.
Step-by-Step Guide to Setting Up Your Laser Welding Machine
Now that you’ve chosen the right machine, it’s time to set it up. Here’s a basic step-by-step guide to ensure you’re starting with the right foot forward:
Prepare the Workspace
Make sure your welding area is clean, free from any flammable materials, and well-lit. This is crucial for both safety and achieving a clean weld.
Prepare Necessary Protection Equipment
Wear protective gear (gloves, goggles, etc.) and ensure your workspace is ventilated properly.
Prepare Welding Wire
Welding of different metal materials requires different welding wires to assist.
How to Choose Welding Wire for Laser Welding Preparation
When preparing for laser welding, selecting the right welding wire is crucial for achieving high-quality and durable welds. The choice of welding wire depends on the material being welded, the thickness of the workpiece, and the specific requirements of the welding job. Below is a systematic guide to help customers choose the appropriate welding wire for different materials.
- Stainless Steel
-
Composition Matching: The welding wire should match the composition of the base material. For instance, when welding 304 stainless steel, ER308 welding wire is commonly used because its chromium and nickel content ensures that the weld has similar corrosion resistance to the base metal.
-
Purity: The welding wire must have high purity, with minimal impurities (like sulfur and phosphorus) to prevent inclusions in the weld, which could affect the weld quality and corrosion resistance. The sulfur content should be below 0.03%.
-
Diameter Selection: Choose the wire diameter based on the thickness of the workpiece:
- Thin sheet welding: 0.8 - 1.2mm.
- Thick sheet welding: 1.6 - 2.4mm.
- Brass (Copper Alloy Welding Wire)
-
For Thin Brass (Thickness <1.5mm): Use a smaller diameter welding wire (0.8 - 1.0mm) to control heat and prevent excessive zinc evaporation, which could reduce the weld's quality.
-
For Medium Brass (Thickness 1.5 - 3mm): A wire diameter of 1.0 - 1.2mm ensures enough filler metal for a strong weld.
-
For Thick Brass (Thickness >3mm): Choose a larger wire diameter (1.2 - 1.6mm) to provide sufficient filler material for a strong, thick weld.
- Aluminum
-
Purity and Alloy Composition: For pure aluminum welding, use high-purity aluminum wires (e.g., 1070, 1100 series). For aluminum alloy welding (e.g., 6061), choose welding wires that match the base material, such as ER4043 or ER5356. ER4043 is suitable for applications where appearance is less critical, but sealing performance is required, while ER5356 offers higher weld strength.
-
Cleanliness: Aluminum is highly prone to oxidation, so it is essential to ensure the wire surface is clean. Prior to use, remove any oil or oxide layer to prevent welding defects.
-
Diameter Selection: The wire diameter should match the material thickness:
- Thin aluminum sheets: 1.0 - 1.6mm.
- Thick aluminum sheets: 2.0 - 3.0mm.

- Carbon Steel (Solid Welding Wire)
-
For Thin Carbon Steel (Thickness <3mm): Use smaller diameter welding wire (0.8 - 1.0mm) to avoid excessive current and prevent burn-through while ensuring good weld formation.
-
For Medium Carbon Steel (Thickness 3 - 6mm): A wire diameter of 1.0 - 1.2mm is suitable to maintain weld quality while improving welding speed.
-
For Thick Carbon Steel (Thickness >6mm): A larger wire diameter (1.2 - 1.6mm) is ideal for providing sufficient filler metal to support higher loads and create stronger welds.
In order to show you how to choose welding wire more clearly, the following table will be the best reference.
| Material | Welding Wire Selection Guidelines | Suitable Diameter | Remarks |
|---|---|---|---|
| Stainless Steel | - Welding wire composition should match the base material (e.g., ER308). - High purity welding wire with minimal impurities. |
- Thin sheet (<3mm): 0.8 - 1.2mm. - Thick sheet (>6mm): 1.6 - 2.4mm. |
- Ensure wire composition matches base material to ensure corrosion resistance. |
| Brass | - Wire selection depends on brass thickness. - Smaller diameter for thin brass to prevent excessive zinc evaporation. |
- Thin brass (<1.5mm): 0.8 - 1.0mm. - Medium thickness (1.5 - 3mm): 1.0 - 1.2mm. - Thick brass (>3mm): 1.2 - 1.6mm. |
- Control heat to prevent weld defects. |
| Aluminum | - High-purity aluminum wire (e.g., 1070, 1100 series). - For alloys, match wire composition with the base material (e.g., ER4043, ER5356). - Keep wire surface clean to prevent oxidation. |
- Thin aluminum (<3mm): 1.0 - 1.6mm. - Thick aluminum (>3mm): 2.0 - 3.0mm. |
- Aluminum is highly prone to oxidation, so ensure wire surface is clean before use. |
| Carbon Steel | - Select wire diameter based on material thickness. - Use smaller diameters for thin steel to prevent overheating. |
- Thin carbon steel (<3mm): 0.8 - 1.0mm. - Medium thickness (3 - 6mm): 1.0 - 1.2mm. - Thick carbon steel (>6mm): 1.2 - 1.6mm. |
- Ensure enough filler metal is provided for stronger welds. |
Select Auxiliary Gas:
In general, nitrogen is sufficient. However, I will provide a more detailed explanation here if you need a very precise weld.
Auxiliary Gases and Flow Rates for Laser Welding of Different Materials
The following table provides a clear overview of the appropriate auxiliary gases and flow rates for different materials and welding requirements.
| Material | Auxiliary Gas | Function | Flow Rate Range |
|---|---|---|---|
| Stainless Steel | Argon | Protects the molten pool and welding area, prevents oxidation and nitriding | Thin plates (< 3mm): 8-12 L/min Thick plates (> 5mm): 12-18 L/min |
| Helium | Enhances plasma stability, improves laser energy absorption rate | Thin plates: 10-14 L/min Thick plates or high-power welding: 14-20 L/min |
|
| Copper | Helium | Enhances laser-copper coupling, prevents oxidation | Thin plates (< 2mm): 12-16 L/min Thick plates (2-5mm): 16-20 L/min |
| Nitrogen | Reduces oxidation of copper, lower cost but requires careful usage | Thin plates: 10-14 L/min Thick plates: 14-18 L/min |
|
| Aluminum | Argon | Protects the molten pool, prevents oxidation of aluminum | Thin plates (< 3mm): 6-10 L/min Thick plates (3-6mm): 10-14 L/min |
| Carbon Steel | Carbon Dioxide (CO2) | Cleans the molten pool, improves weld formation, but excessive CO2 may lead to carbon buildup | Thin plates (< 3mm): 8-12 L/min Thick plates (> 5mm): 12-16 L/min |
| Argon-CO2 Mixture | Combines argon’s protective properties with CO2’s active characteristics to improve weld formation and droplet transition | Thin plates: 10-14 L/min Thick plates: 14-18 L/min |
Notes
-
Argon: As an inert gas, argon is widely used in laser welding of materials like stainless steel and aluminum to protect the welding area from oxidation.
-
Helium: Used to improve laser energy absorption and plasma stability, especially for welding thicker materials like copper and stainless steel.
-
Carbon Dioxide: Suitable for carbon steel welding, helps clean the molten pool but should be used cautiously to avoid excess carbon in the weld.
-
Nitrogen: Applied in copper alloy welding to suppress oxidation, but must be used carefully to prevent quality issues in the weld.
Initial Calibration
Your machine should already be calibrated, but double-check the alignment of the laser head, and ensure the optics are clear and free of dust.
Once these steps are done, you can begin adjusting your settings.
For thin aluminum sheets, a welding wire diameter of 2.0 - 3.0mm is ideal.False
Thin aluminum sheets require smaller wire diameters, typically 1.0 - 1.6mm, to avoid defects.
Welding machines for thick materials need higher power settings.True
Thicker materials require higher power to ensure strong welds and adequate heat input.
How to Set Power and Speed for Different Materials?
The key to great welds is setting the right balance of power and speed for the material at hand.
- Power: The power level determines how much energy the laser emits. Higher power is required for thicker materials or tougher metals.
- Speed: The speed at which the laser moves across the material affects the heat input and, therefore, the weld quality. Too fast, and the weld won’t form properly; too slow, and you could overheat the material.
For example, if you’re welding stainless steel, you might start with settings around 200-300 watts of power and a speed of 1-2 m/min. For aluminum, however, you’ll need to reduce power to 100-150 watts and increase speed, as aluminum is much more heat-sensitive.
Example Settings Laser Welding Parameters:
Below is the laser welding parameter table, which serve as reference values based on common welding needs and material characteristics, but adjustments should be made based on specific welding conditions.
| Material Type | Thickness | Power (W) | Welding Speed (mm/s) | Spot Diameter (mm) | Pulse Frequency (kHz) | Defocus Amount |
|---|---|---|---|---|---|---|
| Stainless Steel | < 1mm | 500 - 1000 | 30 - 80 | 0.2 - 0.4 | 20 - 50 | Positive defocus |
| 1 - 3mm | 1000 - 2000 | 20 - 50 | 0.3 - 0.5 | 30 - 70 | Neutral or positive defocus | |
| > 3mm | 2000 - 3000 | 10 - 30 | 0.4 - 0.6 | 40 - 100 | Negative defocus | |
| Copper | < 1mm | 800 - 1200 | 20 - 50 | 0.2 - 0.3 | 10 - 30 | Positive defocus |
| 1 - 3mm | 1200 - 2000 | 10 - 30 | 0.3 - 0.4 | 20 - 50 | Neutral | |
| > 3mm | 2000 - 3000 | 5 - 20 | 0.4 - 0.5 | 30 - 70 | Negative defocus | |
| Aluminum | < 1mm | 600 - 1000 | 30 - 70 | 0.2 - 0.3 | 15 - 40 | Positive defocus |
| 1 - 3mm | 1000 - 2000 | 20 - 50 | 0.3 - 0.4 | 20 - 60 | Neutral | |
| > 3mm | 2000 - 3000 | 10 - 30 | 0.4 - 0.5 | 30 - 80 | Negative defocus | |
| Carbon Steel | < 3mm | 800 - 1500 | 30 - 70 | 0.2 - 0.4 | 18 - 45 | Positive defocus |
| 3 - 6mm | 1500 - 2500 | 20 - 50 | 0.3 - 0.5 | 25 - 65 | Neutral | |
| > 6mm | 2500 - 3500 | 10 - 30 | 0.4 - 0.6 | 35 - 90 | Negative defocus |
Notes:
-
Power (W): The laser power required for welding, adjusted based on the material thickness.
-
Welding Speed (mm/s): The speed at which the welding is performed. Higher speeds for thinner materials, lower speeds for thicker materials.
-
Spot Diameter (mm): The diameter of the laser spot, affecting the laser focus. Different sizes are suitable for different materials.
-
Pulse Frequency (kHz): The frequency of the pulsed laser. Higher frequencies are used for thinner materials, while lower frequencies are used for thicker materials.
-
Defocus Amount: The distance between the laser focus point and the material surface. Positive defocus is used for thin materials, and negative defocus for thicker materials.
Focus and Alignment: Achieving Perfect Welds
Laser welding is all about precision. This is where focus and alignment come into play. If the laser is not focused correctly on the material, the weld can be inconsistent, or worse, fail completely. Here's what you need to know:
-
Focus: Adjust the focal point of the laser beam to match the thickness and type of material. For most applications, the focal point should be just above the surface of the material.
-
Alignment: Check the alignment of the machine regularly to ensure that the laser beam is hitting the right spot. Misalignment can lead to poor welds or even damage to the machine.
A quick tip: Use a test piece to check the alignment and focus before you start the actual welding. It can save you time and material in the long run.
Advanced Settings: Pulse Duration and Frequency Adjustments
While power and speed are crucial, advanced settings like pulse duration and frequency can really take your welds to the next level. These settings are particularly important when you need to control the heat input and prevent warping, which is often the case with thin materials or delicate components.
-
Pulse Duration: This is the length of time each pulse of the laser lasts. Shorter pulses can be used for fine welding, while longer pulses are better for thicker materials.
-
Frequency: This refers to the number of pulses per second. High frequencies are ideal for thin materials, as they allow for a smoother, more continuous weld.
Adjusting these settings will give you greater control over the welding process, especially for specialized applications like aerospace welding or medical device manufacturing.
The welding speed should always be set to maximum to ensure the strongest weld.False
Welding speed needs to be balanced with power to avoid overheating or improper weld formation.
The composition of welding wire should match the base material for optimal weld strength.True
Matching the wire's composition with the base material ensures a durable and strong weld.
Special Welding Techniques for Specific Applications
Different industries require different welding techniques, and your machine’s settings will need to be adjusted for each application. Here are some examples:
-
Automotive: Automotive parts often require precision welding to avoid damaging sensitive components. Lower power, higher frequency, and faster speed work best here.
-
Aerospace: For aerospace, you’re often dealing with lightweight, high-strength materials. The focus should be on minimizing heat input to avoid warping or damaging the material.
-
Medical Devices : In the medical field, cleanliness is critical. Laser welding is used for creating small, precise joints in implants or surgical tools, where a clean weld is non-negotiable.
Each application demands its own unique set of settings. Make sure to consult your machine’s manual and adjust accordingly for optimal performance.
Troubleshooting: Common Issues and How to Fix Them
Even with the best settings, you might run into issues. Here are some common problems and how to fix them:
-
Weak or Inconsistent Welds: This can be caused by incorrect power settings or a misaligned laser. Recheck your settings and alignment.
-
Excessive Heat: If the material is warping or becoming discolored, the power might be too high. Lower the power or increase the speed.
-
Porous Welds: This can happen when the material is not clean. Make sure the material is free from oil, rust, or dirt before starting.
How to Maintain Your Laser Welding Machine for Optimal Performance?
Maintenance is key to ensuring your laser welding machine continues to perform at its best. Here are some tips to keep it running smoothly:
-
Clean the lenses: Over time, the laser lenses can become dirty, reducing their effectiveness.
Clean them regularly to ensure optimal laser performance. -
Check the cooling system: Overheating can lead to performance issues. Ensure that the cooling system is working properly.
-
Routine Calibration: Periodically calibrate your machine to ensure all settings are accurate.
Following a regular maintenance schedule will extend the lifespan of your machine and keep it working at peak efficiency.
Conclusion: Mastering Laser Welding Setup for Perfect Results
Setting up a laser welding machine may seem complex, but with the right approach, anyone can do it. By understanding the key settings – power, speed, focus, and advanced parameters like pulse duration – you can achieve flawless welds for any application. Whether you’re in aerospace, automotive, or medical manufacturing, mastering these setups will ensure your projects run smoothly and efficiently.
Need help with your laser welding setup? Reach out to Kirin Laser today for expert advice and assistance in optimizing your machine for any application.
Reference:
- "How to Choose the Best Laser Welding Equipment for Your Needs?", from Kirin Laser.
- "What Factors Affect the Price of Fiber Laser Welding Machines?", from Kirin Laser.
- "Top 10 Laser Welding Machine Companies in the USA", from Kirin Laser.
- "Top 10 Laser Welding Machine Companies in China", from Kirin Laser.
- "Top Laser Welding Machines for Sale in 2024", from Kirin Laser.
- "Laser Welding: Which Materials Can You Weld?", from Kirin Laser.